
Deploy Astro-star from Scratch
Step-by-step guide -- even beginners can deploy!
What You Need
- A server
- A registered domain name
- A GitHub account
Environment Preparation
- Node.js
>= 22 - pnpm
10.30.x - PM2
Deployment Process
Option 1: Manual Deployment
If you prefer not to use GitHub Actions, you can deploy manually to your server.
1. Clone the source and install dependencies
ssh username@host
git clone https://github.com/hanlife02/Astro-star.git
cd Astro-star
pnpm install
2. Configure environment variables
Create a .env file in the project root:
# Waline comment server URL
WALINE_SERVER_URL=https://comment.example.com

# Runtime token for the GitHub repository card API (optional)
GH_TOKEN=github_pat_xxxxxxxxxxxxxxxxxxxx

# CodeTime token
CODETIME_TOKEN=xxxxxxxx-xxxx-xxxx-xxxx-xxxxxxxxxxxx

# Algolia index sync (only needed for pnpm algolia:sync)
ALGOLIA_WRITE_API_KEY=xxxxxxxxxxxxxxxx
ALGOLIA_ADMIN_API_KEY=xxxxxxxxxxxxxxxx
3. Build and run
pnpm check
pnpm build
pm2 start ecosystem.config.cjs
pm2 save
The default port is 4321. Change it via an environment variable:
PORT=3000 pm2 start ecosystem.config.cjs
pm2 save
Common operations:
pm2 status
pm2 logs Blog
pm2 restart Blog
pm2 stop Blog
For local development, use pnpm dev and visit http://localhost:4321.
Option 2: GitHub Actions Auto Deployment (Recommended)
1. Fork the Repo
Open the project page and fork the repo.
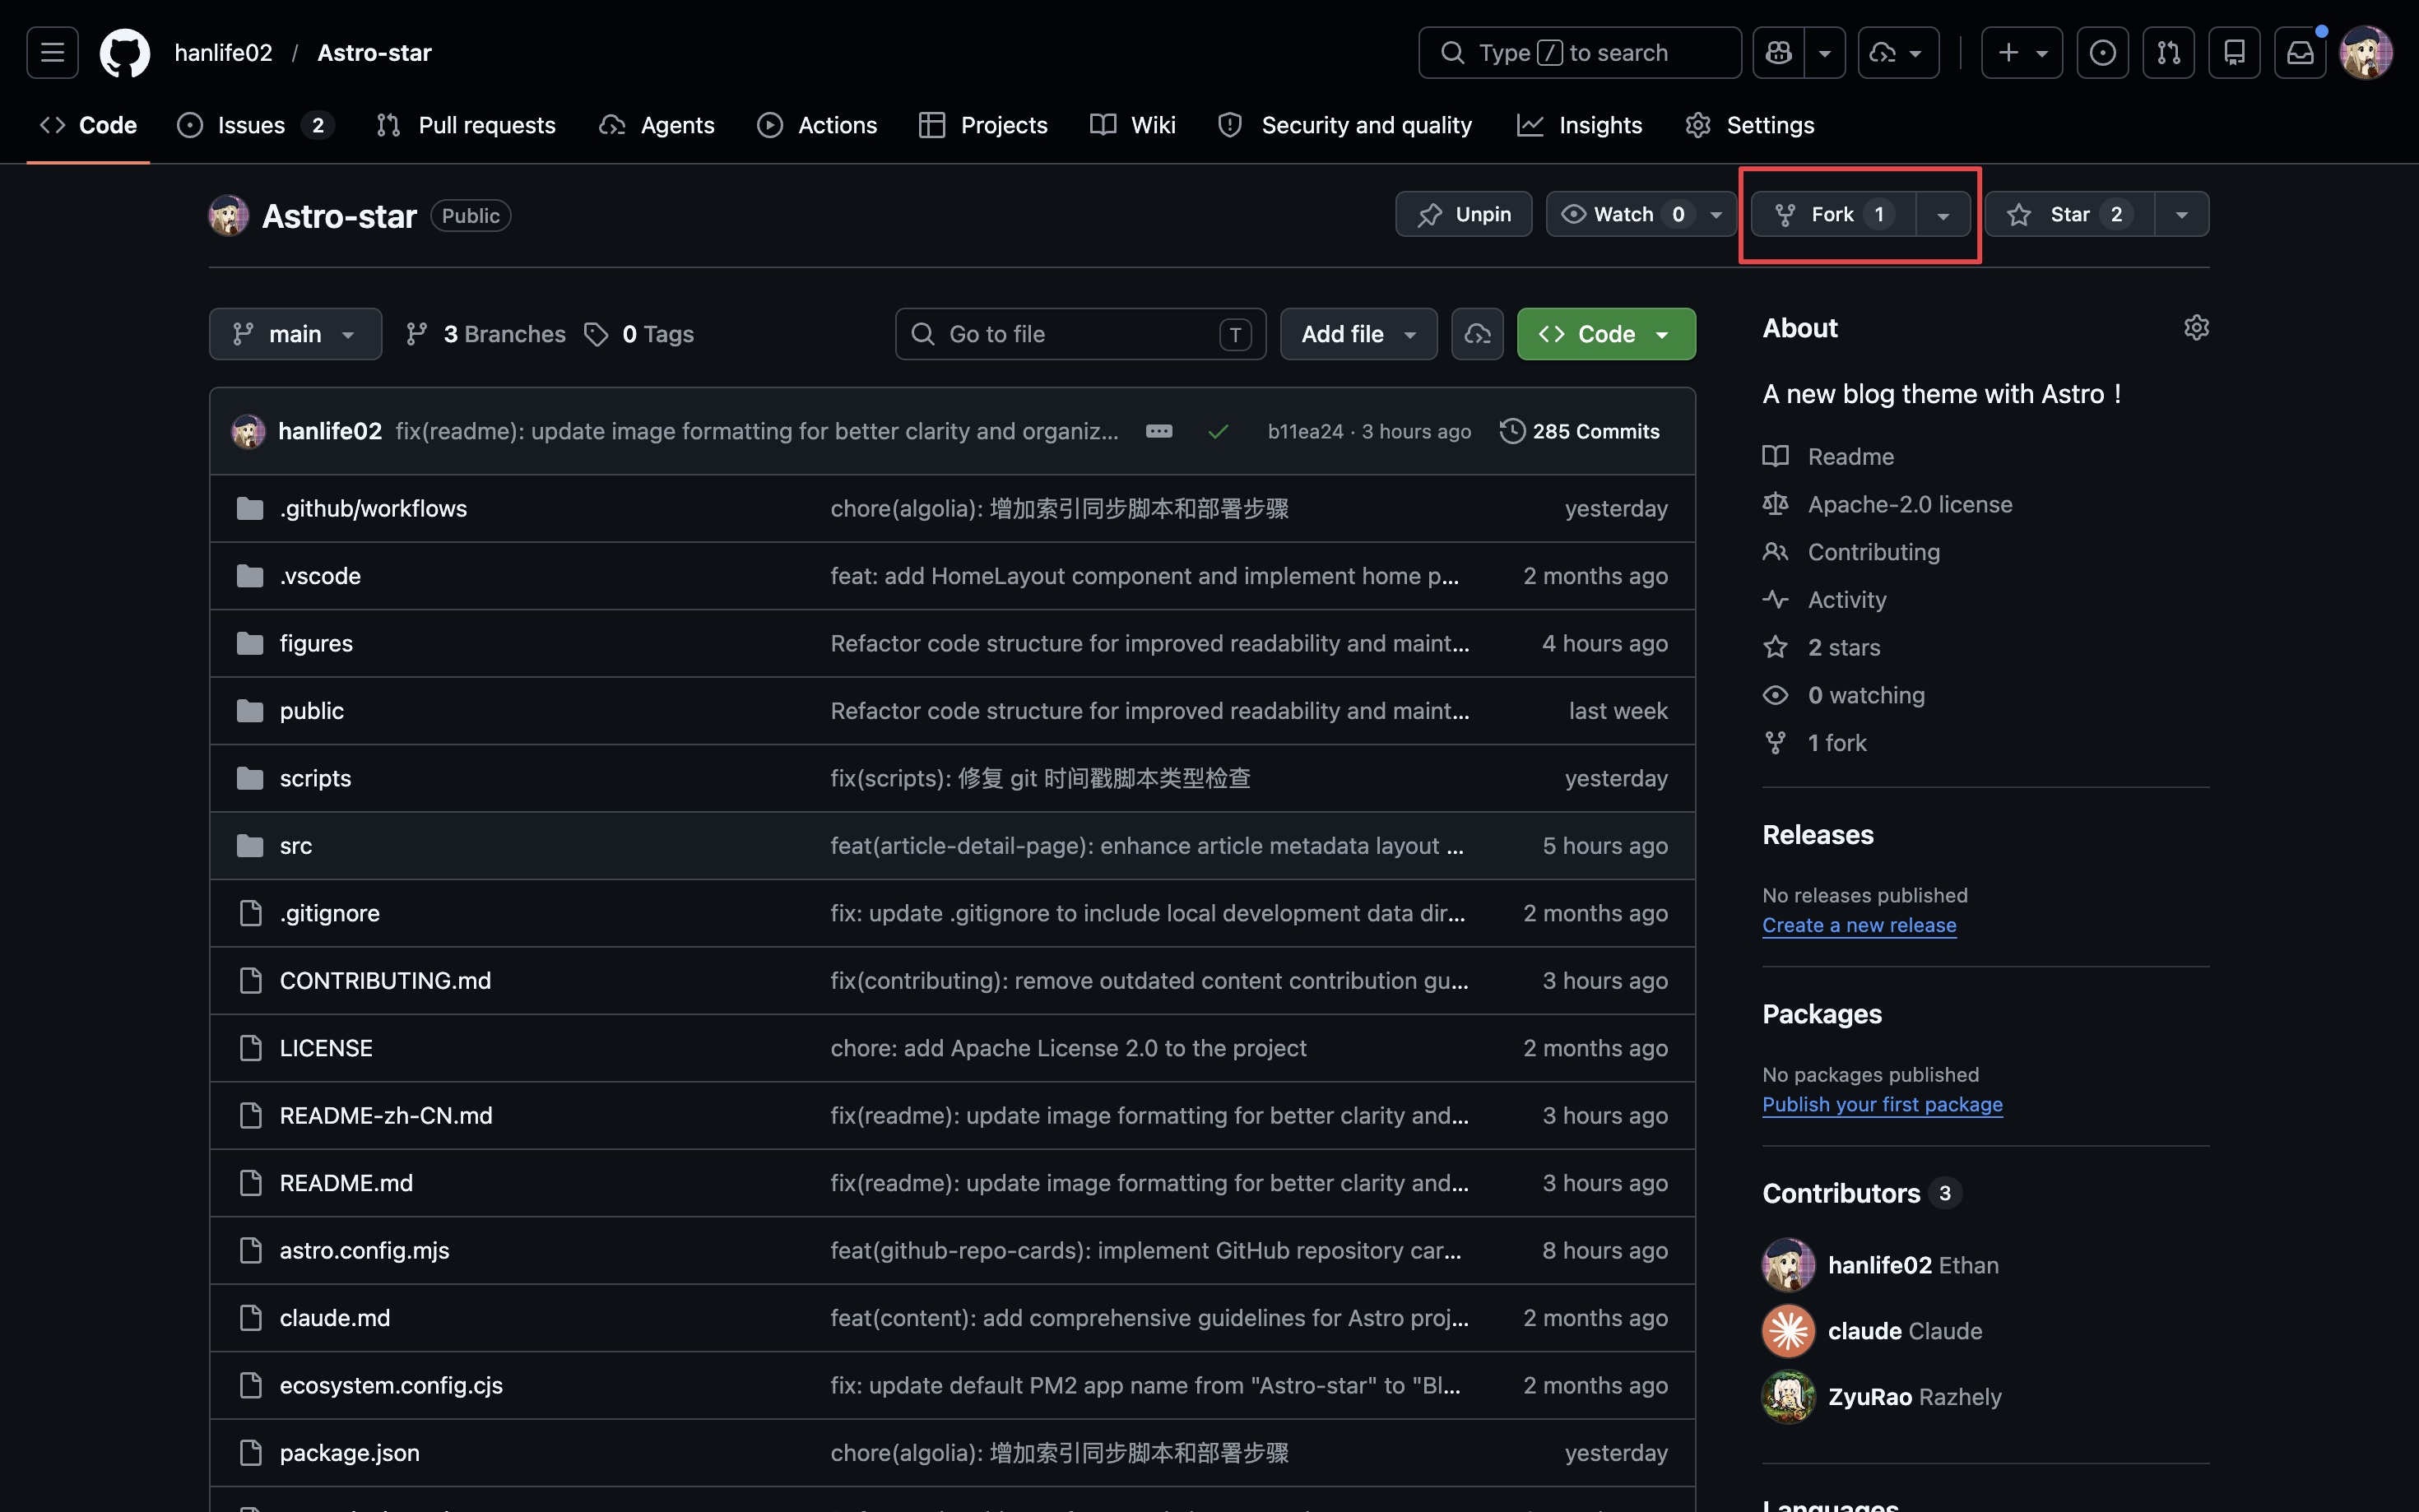
2. Clone the Repo
Clone the forked repo to your local machine.
git clone [fork-repo]
# e.g. git clone https://github.com/hanlife02/Astro-star.git
# Replace hanlife02 with your GitHub username
Confirm the Deployment Branch After Forking
Open .github/workflows/deploy.yml in your fork and confirm the branch that triggers deployment:
on:
  push:
    branches: [main]
For a normal fork, keep or change this value to main, because your fork usually deploys from its default branch. The upstream maintainer may use another personal content branch, such as Ethan, to keep main as the reusable theme template.
3. Modify Configuration
For modifying configuration, refer to Configuration Modification.
4. Modify Content
For modifying articles, refer to Creating Content.
5. Set Up Actions Secrets
Open your forked repo on GitHub, and set the following Secrets as shown below.
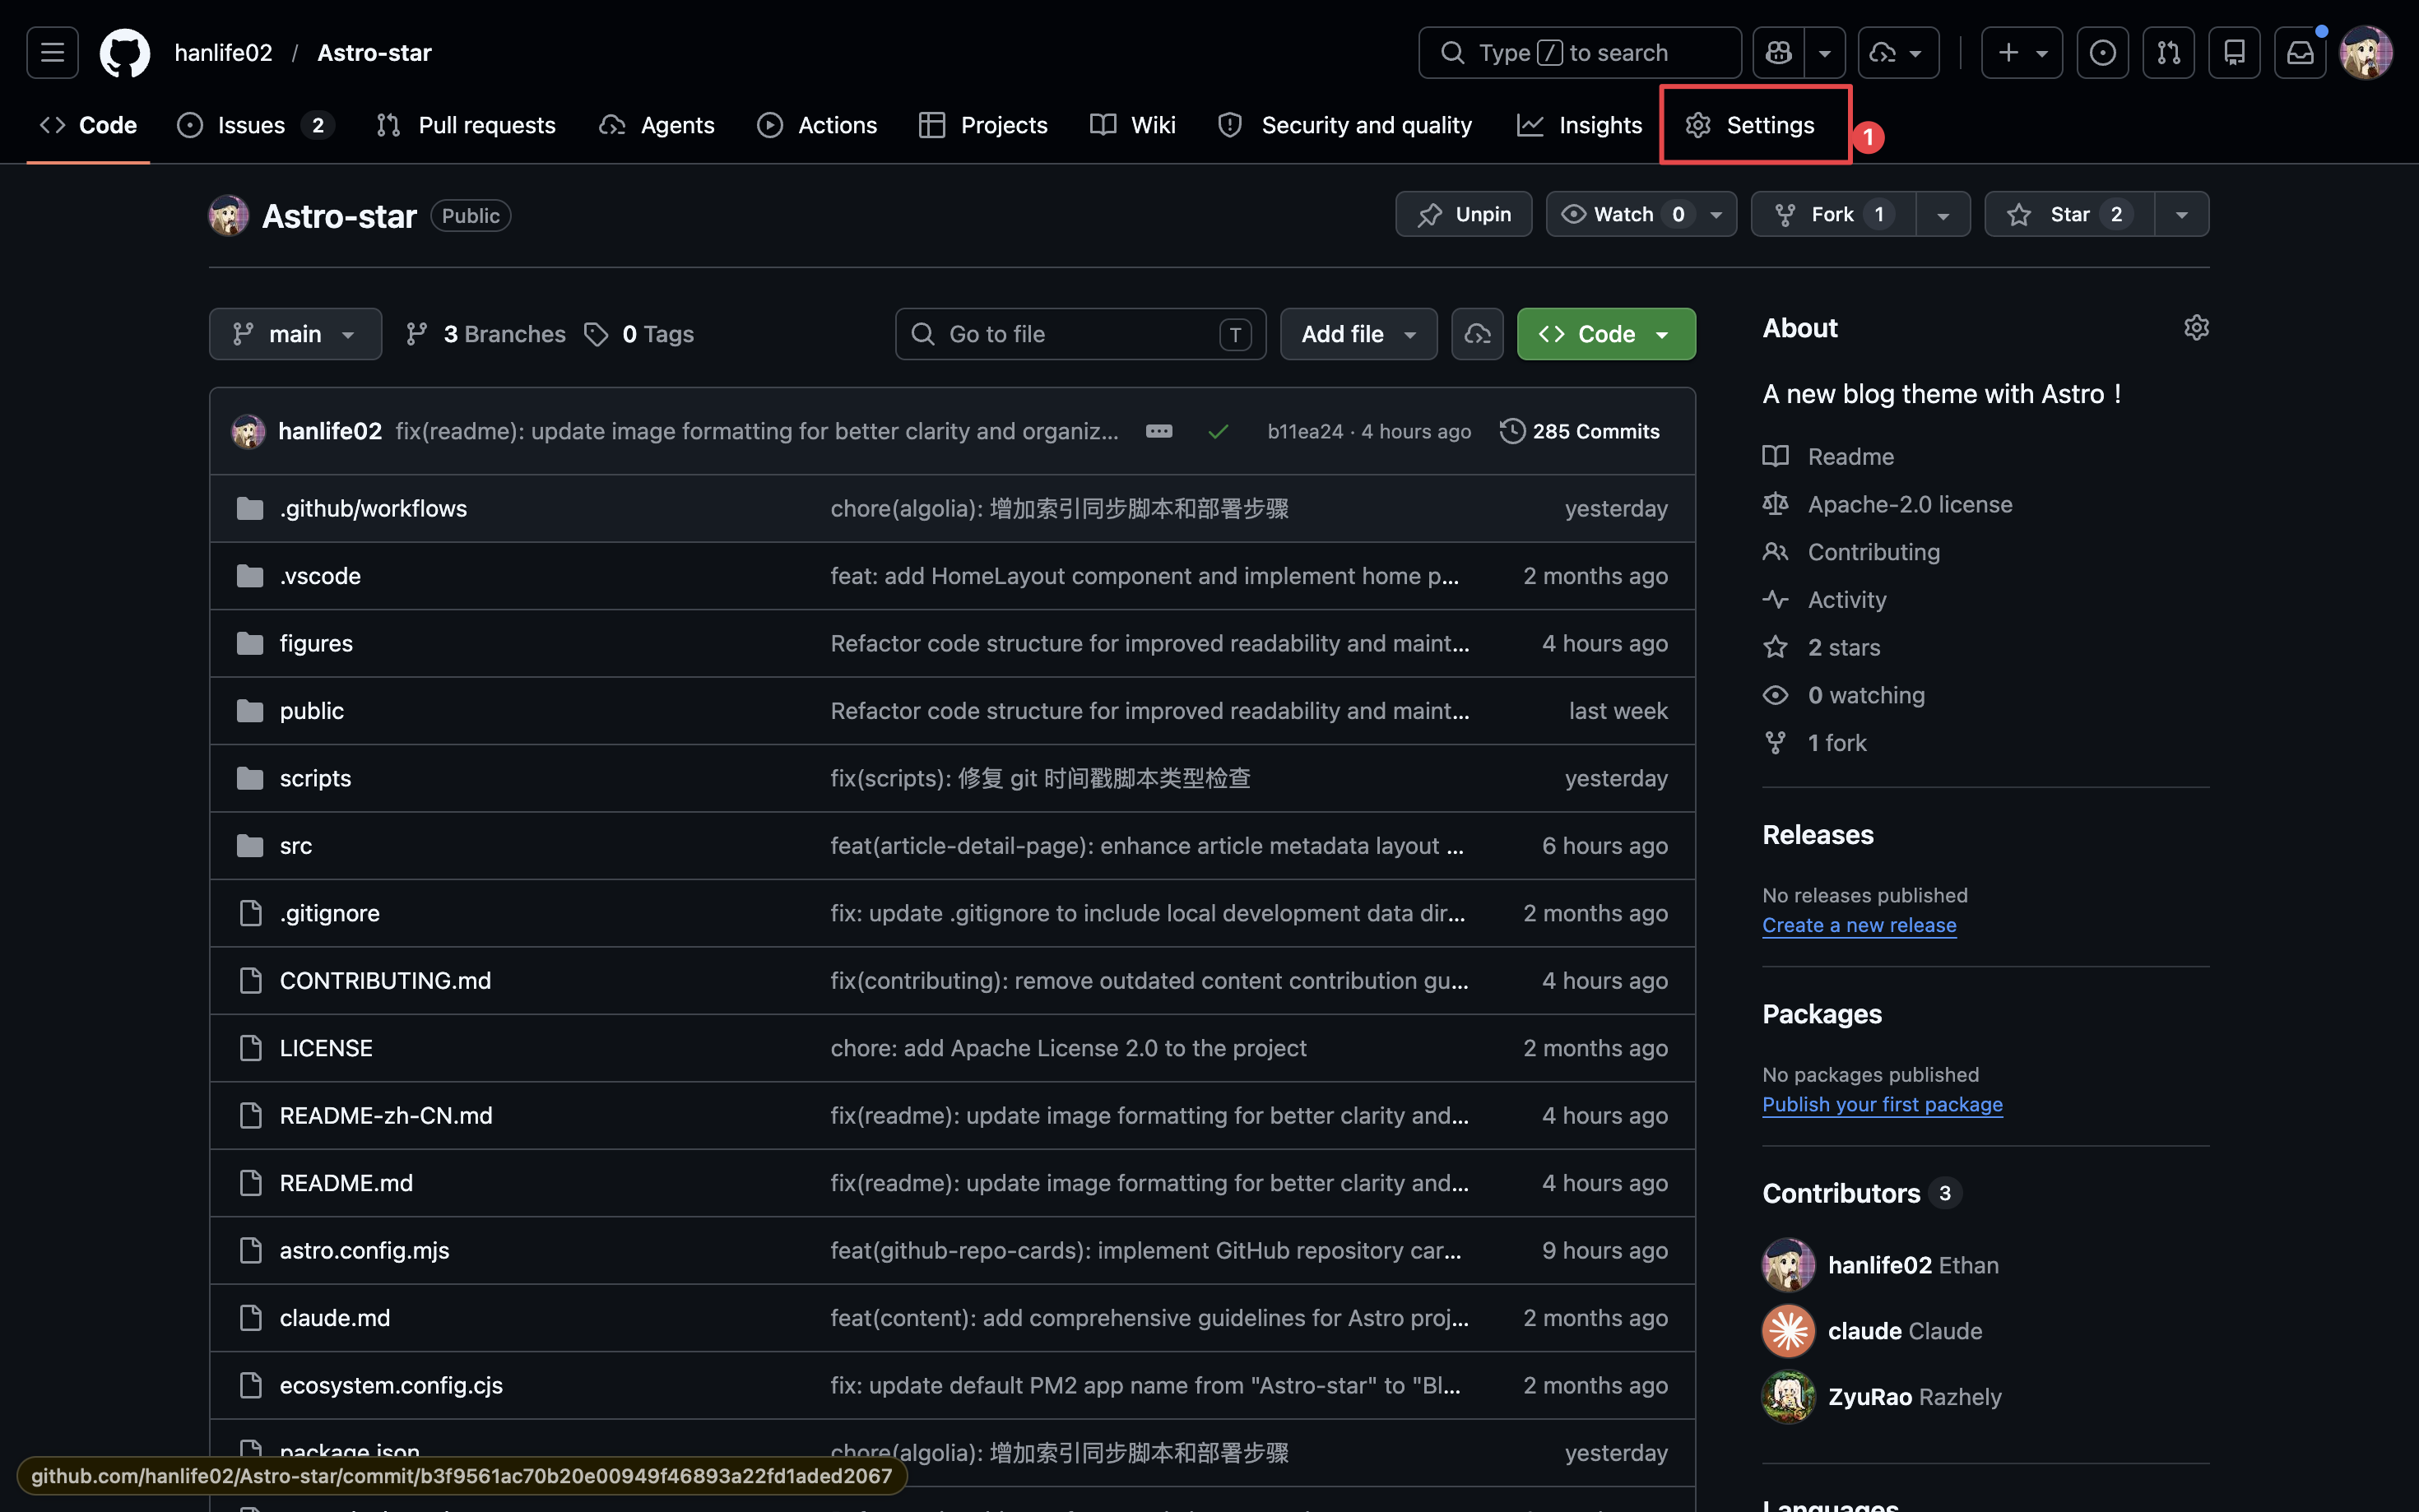
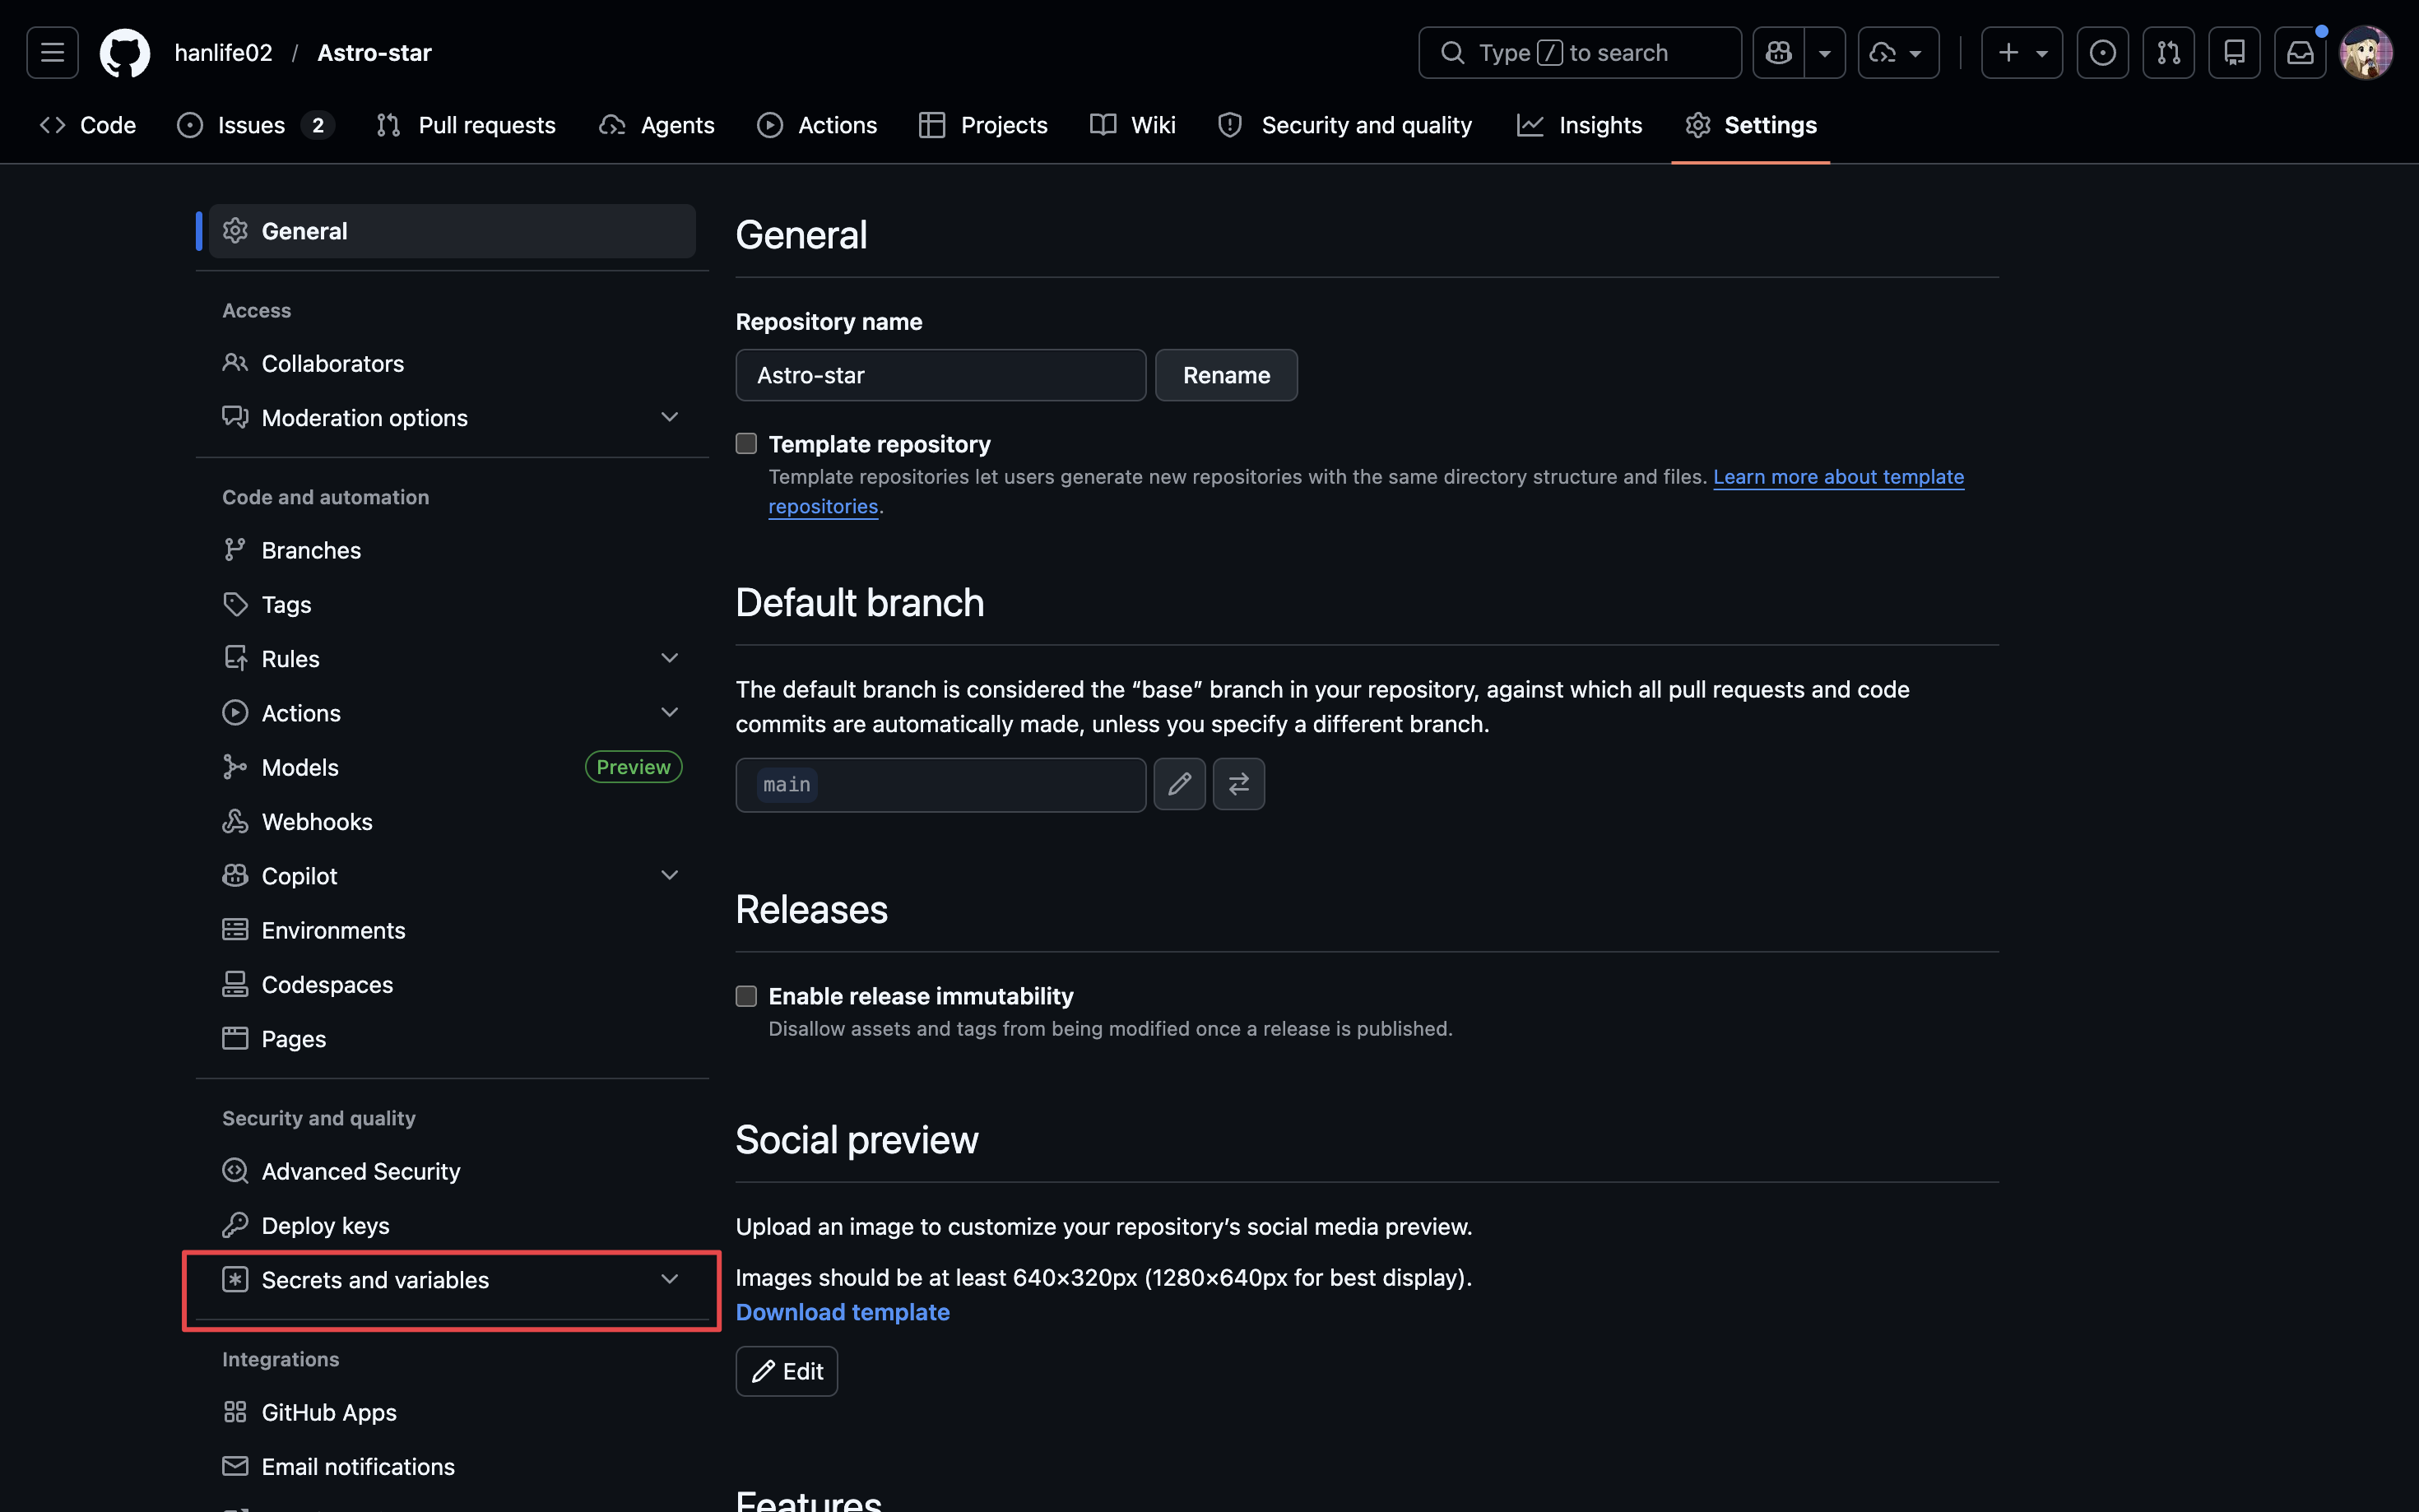
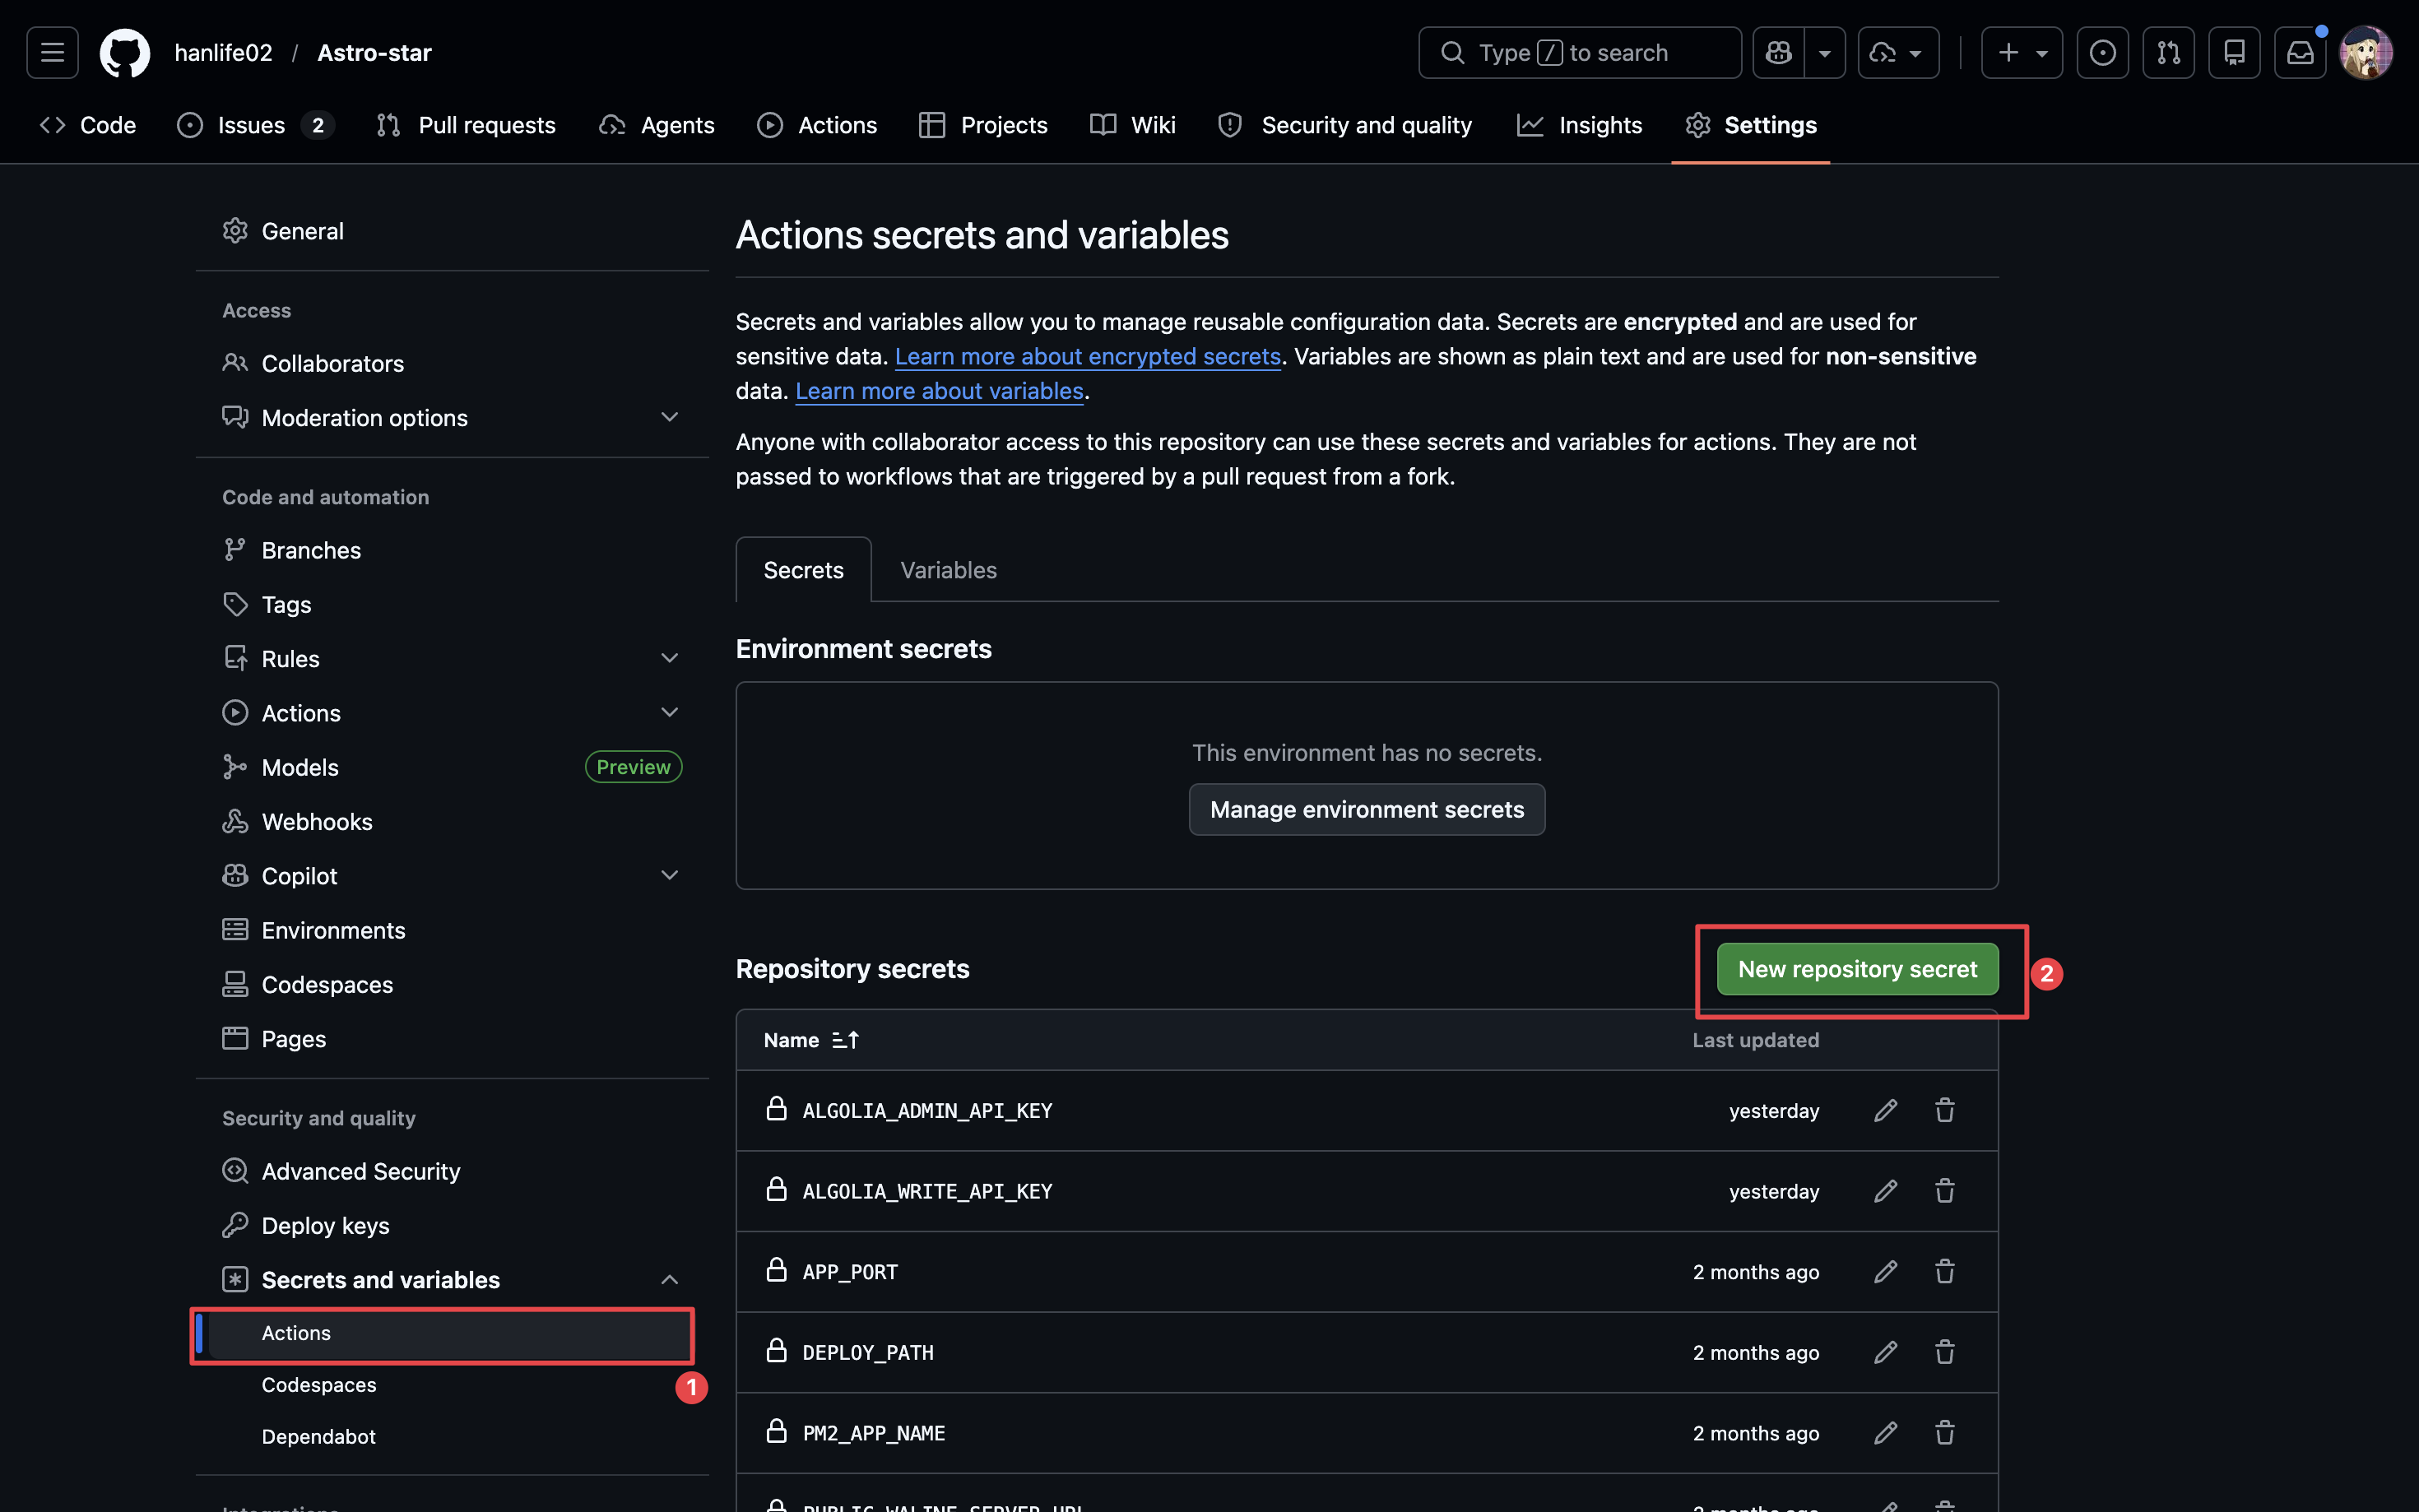
Required:
| Secret | Description |
|---|---|
SSH_HOST | Server public IP or domain |
SSH_PRIVATE_KEY | SSH private key for deployment |
Optional Secrets (add as needed):
| Secret | Default | Description |
|---|---|---|
SSH_USER | ubuntu | SSH user |
SSH_PORT | 22 | SSH port |
DEPLOY_PATH | ~/Astro-star | Directory to deploy on the server |
PM2_APP_NAME | Astro-star | PM2 app name |
APP_PORT | 4321 | Node server port |
PUBLIC_WALINE_SERVER_URL | empty | Waline server URL written to server .env |
GH_TOKEN | empty | Read-only PAT used by the repository card API and written unchanged to .env |
ALGOLIA_ADMIN_API_KEY | empty | Algolia admin API key |
ALGOLIA_WRITE_API_KEY | empty | Algolia write API key |
ACTIONS_PAT | empty | Upstream cross-repository dispatch or branch pushes; normal forks do not need it |
GitHub Actions automatically provides the github.token context for the current workflow, so it must not be created as a repository secret. Use a separate read-only PAT for GH_TOKEN; the deployment workflow writes the same name to the server .env. Do not reuse the write-capable ACTIONS_PAT for the server runtime.
6. Push Changes
Commit the changes from steps 3 and 4, then push to your GitHub remote repo.
git add .
git commit -m "first deploy"
git push
7. Check Deployment Status
Open the Actions tab to see if the deployment succeeded.
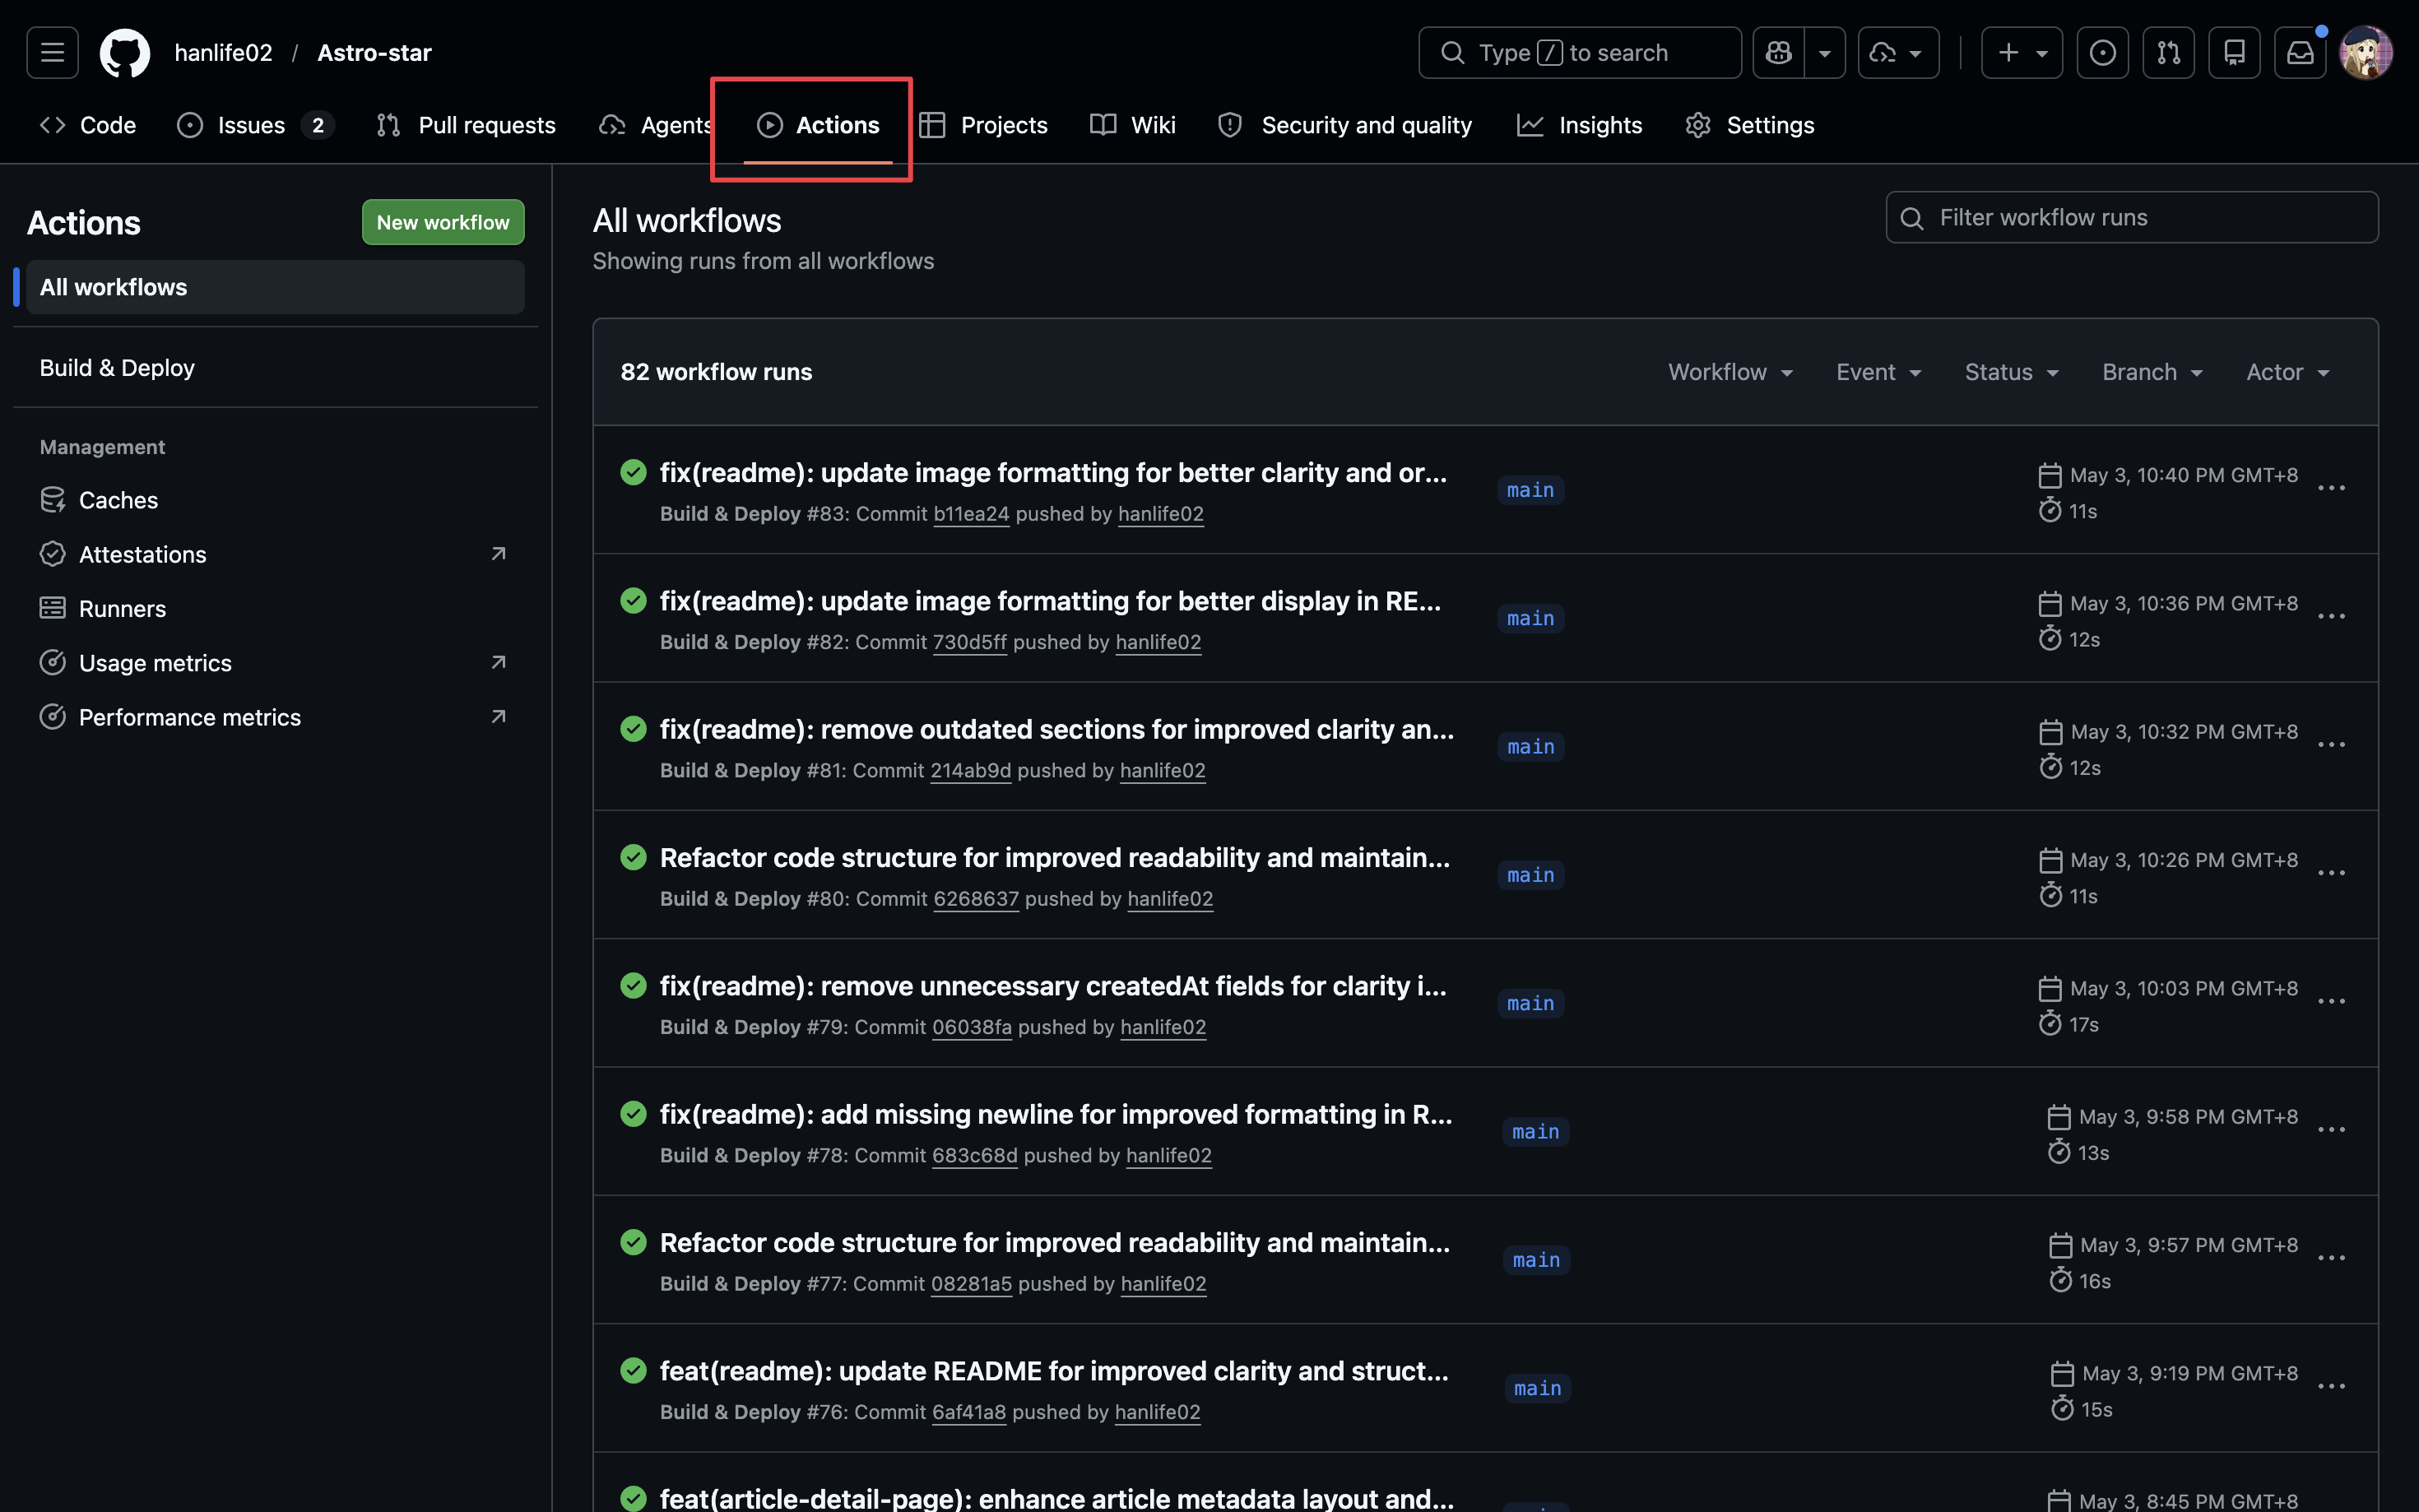
If deployed successfully, your service is now running on port 4321 (or your custom port) on your server.
If you know how, you can check on the server whether the port service is running correctly.
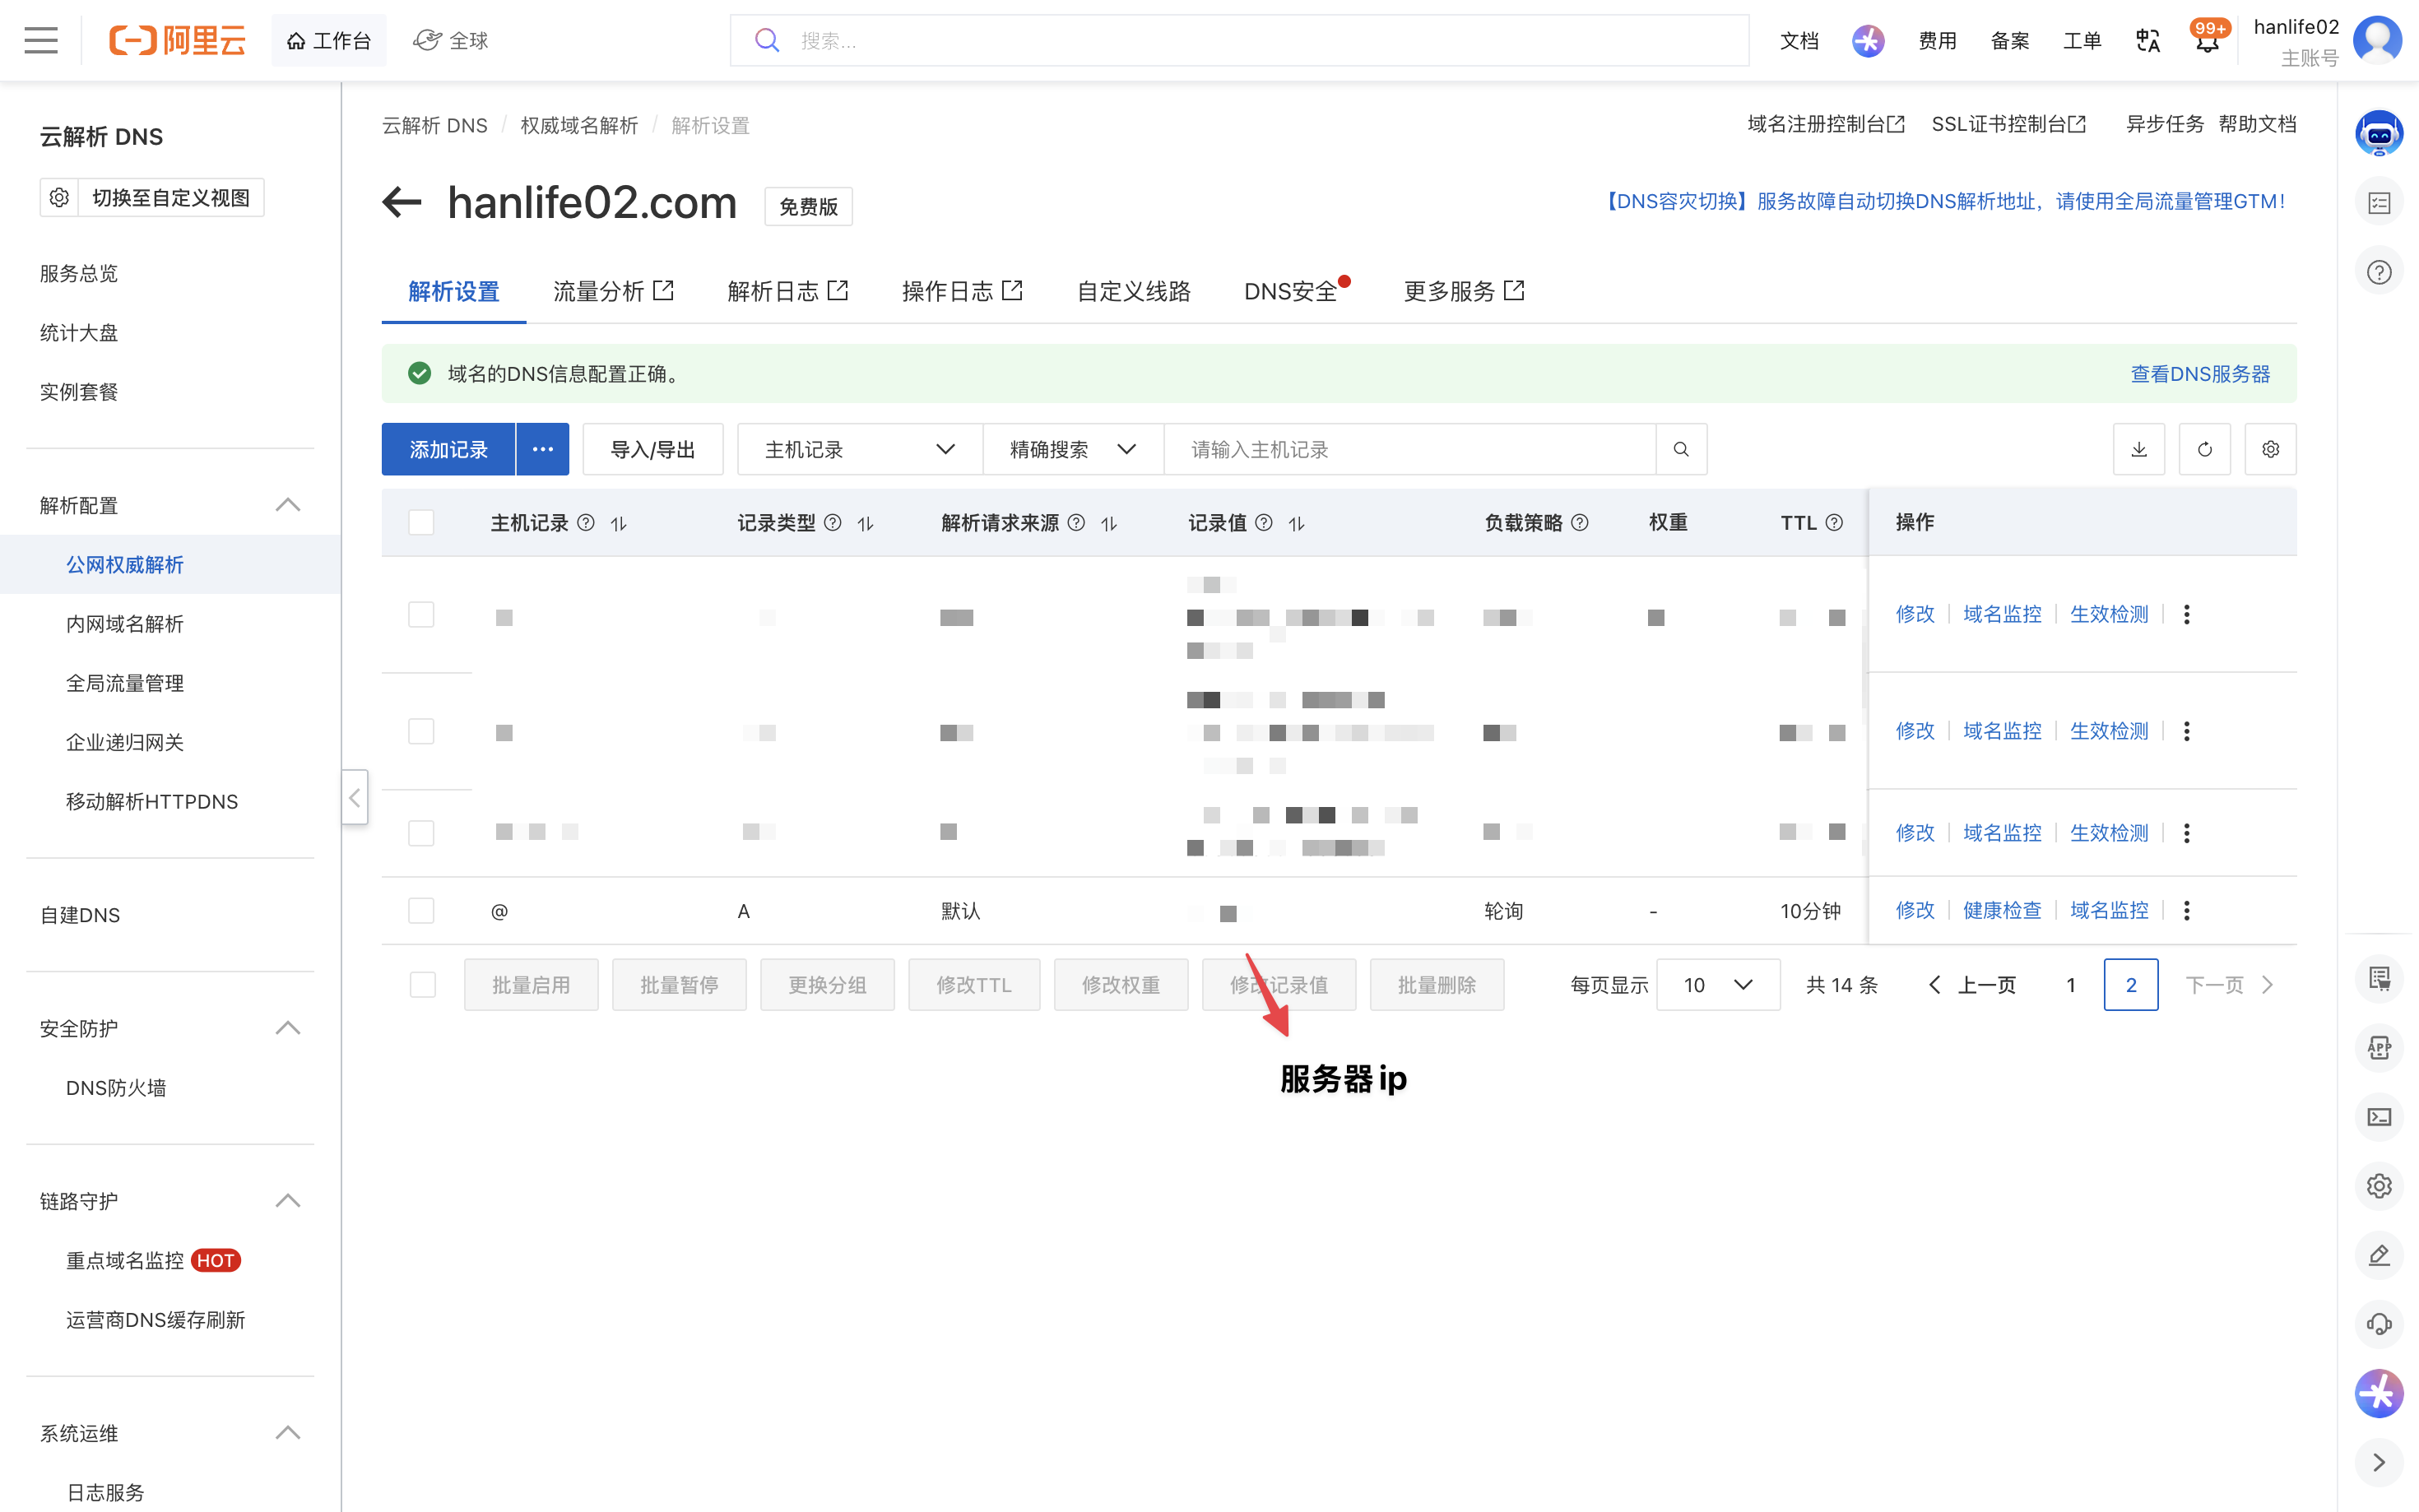
8. Configure Domain Name Resolution
Here we use a domain registered on Alibaba Cloud as an example. Point your registered domain to your server. You can refer to the documentation:
9. Reverse Proxy Configuration
For reverse proxy configuration, refer to Reverse Proxy Configuration.
Congratulations!
Open your domain with the reverse proxy configured. If your blog homepage displays correctly, congratulations -- you have completed the entire deployment!
If you need to integrate Waline or Algolia, refer to Waline Integration and Algolia Integration.